Captive Portal Configuration
If your network is implementing registration or assessment/remediation, you define the branding and behavior of the portal website used by the end user during the registration or assessment/remediation process using a Portal Configuration. ExtremeControl engine s ship with a default Portal Configuration. You can use this default configuration as is, or make changes to the default configuration using this window, if desired.
ExtremeControl engine s ship with a default Portal Configuration. You can use this default configuration or reconfigure it. If you network is using an external captive portal service (for example, ExtremeGuest), use the External Captive Portal configuration type when creating a new portal configuration.
This Help topic provides the following information for accessing and configuring the Portal Configuration:
- Accessing the Portal Configuration
- Default portal configuration
- Network Settings
- Administration
- Look and Feel
- Guest Web Access
- Authenticated Web Access
- Assessment/Remediation
Use the following steps to access the Portal Configuration:
- Open the Control >Access Control tab.
- In the left-panel, expand Configuration.
- Expand Captive Portals.
- Expand a Portal Configuration.
Default portal configuration
Network Settings
Use this panel to configure common network web page settings that are shared by both the Assessment / Remediation and the Registration portal web pages.
Administration
Use this panel to configure the settings for the Registration Administration web page and grant access to the page for administrators and sponsors.
The Registration Administration web page allows Helpdesk and IT administrators to track the status of registered end-systems, as well as add, modify, and delete registered end-systems on the network.
Website Configuration
Use this tab to configure the common settings used by the different registration web pages, including selecting guest access, authentication settings, and whether assessment and remediation is supported.
Look and Feel
Use the Look and Feel panel to configure common web page settings shared by both the Assessment / Remediation and the Registration portal web pages.

Display Powered by Logo Select this checkbox to display the Extreme Networks logo at the bottom of all of your portal web pages. Header Select the Edit button to open a window where you can configure the link for the header image displayed at the top of all portal web pages. By default, the header image is configured as the Extreme Networks logo acting as a link to the Extreme Networks website. Text entered in this window can be formatted in HTML. Footer Select the Edit button to open a window where you can configure the footer displayed at the bottom of all portal web pages. By default, the footer is configured with generalized information concerning an organization. Change the example text in this section to customize the footer to your own organization. Text entered in this window can be formatted in HTML. Helpdesk Information Select the Edit button to open a window where you can configure the Helpdesk contact information provided to end users in various scenarios during the assessment/remediation and registration process (e.g. an end-system exceeded the maximum number of remediation attempts). By default, this section is configured with generalized Helpdesk information, such as contact URL, email address, and phone number. Change the example text to customize the Helpdesk information for your own organization. Text entered in this window can be formatted in HTML. In addition, the entire contents of the Helpdesk Information section are stored in the variable "HELPDESK_INFO". By entering "HELPDESK_INFO" (without the quotation marks) in any section that accepts HTML in the Common Page Settings (or any other settings), all information configured in this section will be displayed in place of "HELPDESK_INFO". Title Select the Edit button to open a window where you can modify the text that appears in the title bar of the registration and web access page browser tabs. The default page title is "Enterprise Registration." Welcome Message Select the Edit button to open a window where you can modify the message displayed to users on the menu bar of any registration or web access page. The default welcome message is "Welcome to the Enterprise Network's Registration Center." User Registration Success Select the Edit button to open a window where you can edit the message displayed to the end user after successfully registering their end-system to the network. Images Using the dropdown menus, you can specify the image files used in the portal web pages. All image files used for Assessment/Remediation and Registration portal web pages must be defined in this list. The image files defined here are sent to the ExtremeControl engine along with the web page configuration. Use the Add button to select an image file to add to the list. You can select an image in the list and use the Preview button to preview the image.
When an image file is defined here, it is available for selection from the configuration drop-down lists (for example, when you configure the Access Granted Image), and may be referenced in the sections supporting HTML. Available drop-down lists include:
- Header Background Image Select the background image displayed behind the header image at the top of all portal web pages. The drop-down list displays all the images defined in the Images window for your selection. To add a new image, select Add to open the Images window.
- Header Image Select the image displayed at the top of all portal web pages. The drop-down list displays all the images defined in the Images window for your selection. To add a new image, select Add to open the Images window.
- Favorites Icon Select the image displayed as the Favorites icon in the web browser tabs. The drop-down list displays all the images defined in the Images window for your selection. To add a new image, select Add to open the Images window.
- Access Granted Image Select the image displayed when the end user is granted access to the network either based on compliance with the network security policy or upon successful registration to the network. The drop-down list displays all the images defined in the Images window for your selection. To add a new image, select Add to open the Images window.
- Access Denied Image Select the image you would like displayed when the end user has been denied access to the network. The drop-down selection list displays all the images defined in the Images window for your selection. To add a new image, select Manage Images to open the Images window.
- Error Image Select the image displayed when there is a communication error with the ExtremeCloud IQ Site Engine Server. The drop-down list displays all the images defined in the Images window for your selection. To add a new image, select Add to open the Images window.
- Busy Image Select the progress bar image displayed to the end user when the web page is busy processing a request. The drop-down list displays all the images defined in the Images window for your selection. To add a new image, select Add to open the Images window.
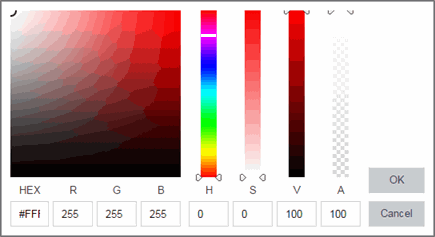
Colors Select the Background or Text color box corresponding to each item listed to choose your colors for the portal web pages:
- Page — Define the background color and the color of all primary text on the web pages.
- Header Background Color — Define the background color displayed behind the header image.
- Menu Bar — Define the background color and text color for the menu bar.
- Menu Bar Highlight — Define the background color and text color used for the menu bar highlights in the Administration pages.
- Footer — Define the background color and text color for the footer.
- Table Header — Define the background color and text color for the table column headers in the Administrative web pages.
- In-Progress — Define the background color and text color for task in-progress images.
- Hyperlink — Define the color used for hyperlinks on the web pages.
- Hyperlink Highlight — Define the color of a hyperlink when it is highlighted.
- Accent — Define the color used for accents on various parts of the web pages.
Select OK to save the changes.
Style Sheets Select the Desktop or Mobile buttons to open the Edit Style Sheet window where you can create a style sheet that adds to or overwrites the formatting styles for the portal, or mobile version of the portal web pages, respectively. Locales This field lists the locales (languages) presented as options to the user in the captive portal, in addition to the default locale.
You can also define the default locale (language), displayed to any captive portal user unless the client locale detected from their browser matches one of the defined supplemental locales. The list of available locales includes the current default locale and any supplemental defined locales. Display Locale Selector Select this checkbox if you want a locale (language) selector to display as a drop-down list in the menu bar on the captive portal welcome and login pages. This is useful for a shared machine where the users of the machine may speak different languages. (On the mobile captive portal, the selector is displayed as a list of links at the bottom of the welcome screen.)
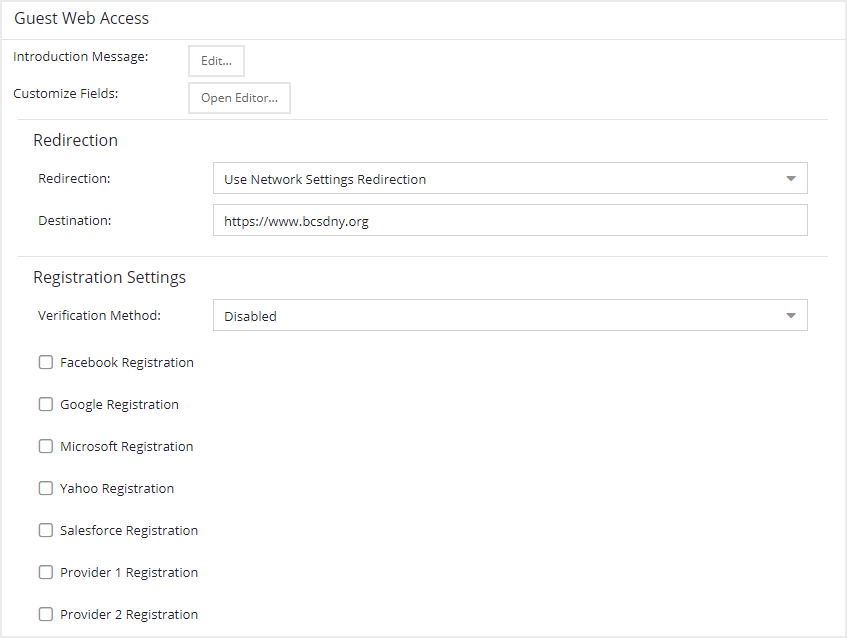
Guest Web Access
Guest Web Access provides a way for you to inform guests that they are connecting to your network and lets you display an Acceptable Use Policy (AUP).
End users are initially redirected to the captive portal when they first connect to the network. After the user enters the required information on the Guest Web Access login page (typically, their name and email address), they are allowed access on the network according to the assessment and authorization defined in the Guest Access profile.
Guest web access provides a single session, and no permanent end user records are stored. This provides increased network security, and also allows you to minimize the number of registration records stored in the ExtremeCloud IQ Site Engine database.
Implementing guest web access requires web redirection or DNS proxy.
- Use Network Settings Redirection — Use the Redirection option specified on the Network Settings.
- Disabled — This option disables redirection. The end user stays on the same web page where they were accepted onto the network.
- To User's Requested URL — This option redirects the end user to the web page they originally requested when they connected to the network.
- To URL — This option lets you specify the URL for the web page where the end user will be redirected. This would most likely be the home page for the enterprise website, for example, "http://www. ExtremeNetworks.com ."
Registration Settings
- Email — The end user must enter an email address in the Guest Web Access login page. The Email Address field must be set to Required in theManage Custom Fields.
- SMS Gateway — The end user must enter a mobile phone number in the Guest Web Access login page. The Phone Number field must be set to Required in Manage Custom Fields.
- SMS Gateway or Email — The end user must enter a mobile phone number or email address in the Guest Web Access login page. The Phone Number and Email Address fields must be set to Visible in the Manage Custom Fields.
- SMS Text Message — The end user must enter a mobile phone number in the Guest Web Access login page. The Phone Number field must be set to Required in the Manage Custom Fields.
- SMS Text or Email — The end user must enter either a mobile phone number or email address in the Guest Web Access login page. The Phone Number and Email Address fields must be set to Visible in the Manage Custom Fields.
| NOTE: | Not all cellular service providers provide a way to send SMS text messages via email.
|
If you have selected the "SMS Gateway" or "SMS Gateway or Email" method: enter the SMS Gateway Email address provided by the SMS Gateway provider.
For all methods: use the Message Strings Edit button (below the verification method) to open the Message Strings Editor and modify the registration verification messages displayed to the user during the verification process. For example, if you have selected Email, you need to modify the "registrationVerificationEmailSentFromAddress" message string to be the appropriate email address for your company.
For all methods: set the Verify Pin Characters and Verify Pin Length options to define the characteristics and length of the verification code that is sent to the guest end user. This setting is shared by Guest Registration and Guest Web Access. Changing it for one access type also changes it for the other.
Third-party guest registration
Select additional registration types to implement guest registrations using a third-party as a way to obtain end user information. The registration portal provides the end user with an option to log into a third-party account in order to complete the registration process.
| NOTE: | Guest OAuth (for example, Google, Yahoo) may not support native mobile browsers and display a “user agent” error. To access the network, use a standard browser application (e.g. Google Chrome).
|
For more information, see the appropriate topic:
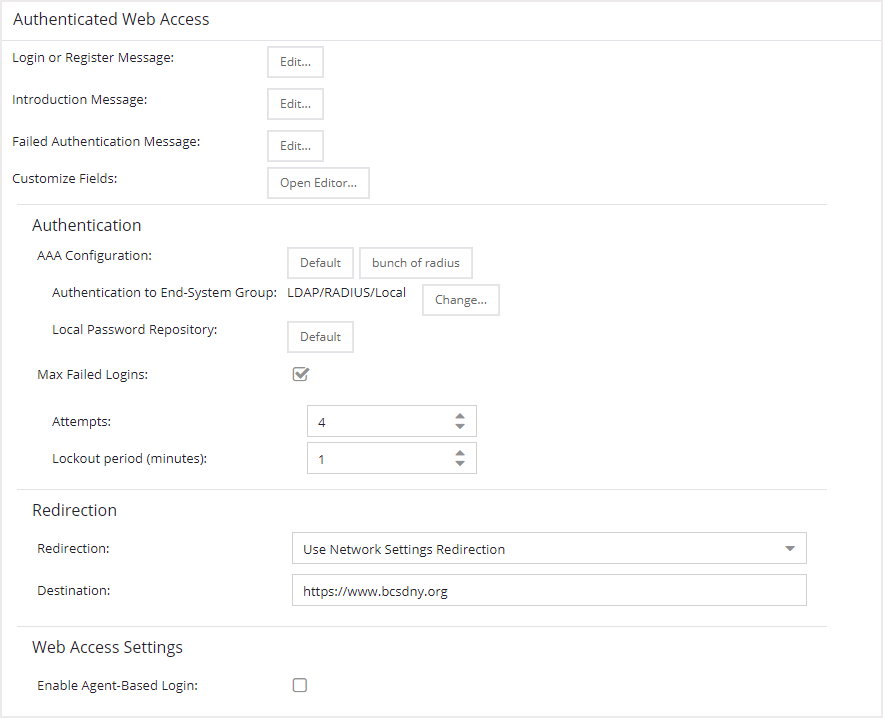
Authenticated Web Access
Authenticated web access provides a way to inform end users that they are connecting to your network and lets you display an Acceptable Use Policy.
End users are required to authenticate to the network using the Authenticated Web Access login page. However, end users are only granted one-time network access for a single session, and no permanent end user registration records are stored. Authentication is required each time a user logs into the network, which can be particularly useful for shared computers located in labs and libraries.
Implementing authenticated web access requires web redirection or DNS proxy.
These settings are shared by the Authenticated Web Access and Authenticated Registration access types. Changing them for one type also changes them for the other.
Login or Register Message Select the Edit button to open a window where you can edit the message displayed to the end user when they are registering. By default, the message states that the end user is required to register before being allowed on the network. Introduction Message Select the Edit button to open a window where you can edit the introductory message displayed to the end user when they are registering. By default, the message states that the end user is agreeing to the terms and conditions in the Acceptable Use Policy. Failed Authentication Message Select the Edit button to open a window where you can edit the message displayed to the end user if the end user fails authentication. By default, this message advises the end user to contact their network administrator for assistance. Note that the default configuration of the message references the "HELPDESK_INFO" variable which represents the Helpdesk Information that is defined in the Look and Feel Settings. Customize Fields (Shared) Select the Open Editor button to open the Manage Custom Fields where you can manage the fields displayed in the Registration web page.
Authentication
These settings are shared by the Authenticated Web Access and Authenticated Registration access types. Changing them for one type also changes them for the other.
- Authentication to End-System Group — Select the Change button to open the User Group to End-System Group Map window where you can map the LDAP/RADIUS/Local User Group to the appropriate end-system group to specify end user access levels. When an end-system group has been mapped to a user group, the icon for the end-system group changes to display a key indicating that it is no longer available for general use. You can use the Move Up/Move Down arrows to set the precedence order for the mappings, allowing you to change the authentication order that takes place during the user authenticated registration.
- Local Password Repository — If you are using a local repository, authenticated end users are assigned to the Web Authenticated Users group. Select the Default button to open a window where you can edit the Local Password Repository. Multiple links may be listed if there are different repositories associated with different AAA configurations.
Redirection
These settings are shared by the Authenticated Web Access and Authenticated Registration access types. Changing them for one type also changes them for the other.
- Use Network Settings Redirection — Use the Redirection option specified on the Network Settings.
- Disabled — This option disables redirection. The end user stays on the same web page where they were accepted onto the network.
- To User's Requested URL — This option redirects the end user to the web page they originally requested when they connected to the network.
- To URL — This option lets you specify the URL of the web page to which the end user is redirected. This is typically the home page for the enterprise website, for example, "http://www. ExtremeNetworks.com ."
Web Access Settings
Enable Agent-Based Login If this option is enabled, when the end user connects to the network with an agent installed, the login dialog is displayed in an agent window instead forcing the user to go to the captive portal via a web browser. This allows you to provide authenticated web access without having to set up the captive portal. Agent-based login is useful for shared access end-systems running an agent because it prompts for a login dialog and also provides a logout option. Login credentials are limited to username/password and an Acceptable Use Policy is not displayed.
You can customize the messages in the Agent Login window using the Message Strings Editor available in the Look and Feel settings. Use the agentLoginMessage string to change the message. Any changes you make in the Message Strings Editor override the internationalized messages used in the Agent Login window.
| NOTE: | If you configure both guest registration and authenticated registration for an area on your network, the end user is presented with a choice on the registration web page whether or not to authenticate.
|
|---|
Assessment/Remediation
Assessment/Remediation allows you to configure the settings for the portal web page.
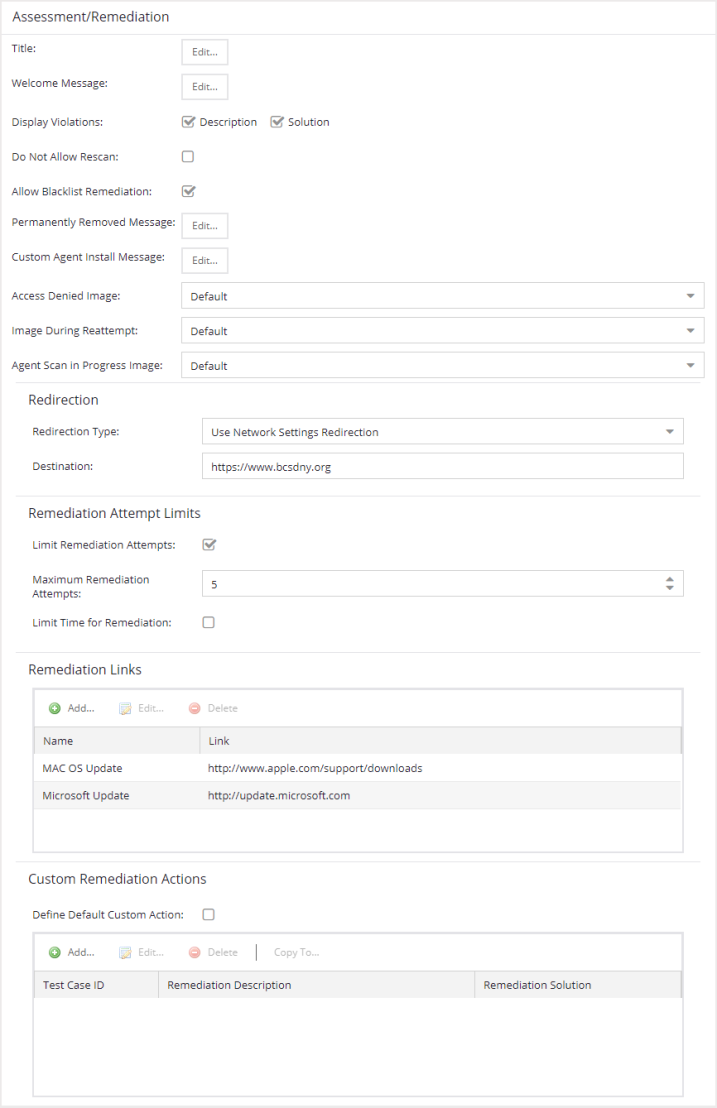
Web Page Settings
- None — No violations are displayed to the web page. This option might be used for an ExtremeControl engine that is serving web pages to guest users, when you do not want the guest users to attempt to remediate their end-system.
- Description — Only the description is displayed for violations. This provides the end user with information concerning what violation was found, but no information concerning how it can be fixed. This configuration may be appropriate for scenarios where the user population of the network does not possess technical IT knowledge and is not expected to self-remediate. It provides the Helpdesk personnel with technical information about the violation when the end user places a call to the Helpdesk.
- Solution — Only the solution is displayed for violations, allowing the end user to perform self-service remediation without knowing what the violation is. This configuration may be appropriate for scenarios where the user population on the network does not possess technical IT knowledge but is expected to self-remediate.
- Description and Solution — Both the description and solution are displayed for violations. This provides the end user with information concerning what violation was found and how to fix it. Providing complete information concerning the violation gives the end user the best chance of self-remediation, however, the technical details of the violation may result in end user confusion. Therefore, this configuration may be appropriate for scenarios where the user population of the network possesses more technical IT knowledge.
- Use Network Settings Redirection — Use the Redirection option specified in the Network Settings.
- Disabled — This option disables redirection. The end-user stays on the same web page where they were accepted onto the network.
- To User's Requested URL — This option redirects the end user to the web page they originally requested when they connected to the network.
- To URL — This option lets you specify the URL of the web page to which the end-user is redirected. This is typically the home page for the enterprise website, for example, "http://www. ExtremeNetworks.com ."
Remediation Attempt Limits
Limit Remediation Attempts Select this checkbox to limit the maximum number of times an end-user is allowed to initiate a rescan of their end-system after initially being quarantined, in an attempt to remediate their violations. If selected, enter the number of attempts allowed. Limit Time for Remediation Select this checkbox to limit the total interval of time an end user is allowed to initiate a rescan of their end-system after initially being quarantined, in an attempt to remediate their violations. If selected, enter the amount of time in minutes.
Remediation Links
This table lists the links displayed on the Assessment/Remediation web page for the end users to use to remediate their end-system violations. There are two default remediation links: Microsoft Support and MAC OS Support. Use this tab to add additional links such as an internal website for patches. Links must contain a valid protocol prefix (http://, https://, ftp://).
Select Add to open a window where you can define a new link's name and URL. Select a link and select Edit to edit the link's information. Select Delete to remove a URL from the table.
Custom Remediation Actions
Use this table to create your own custom remediation action for a particular violation to use in place of the remediation action provided by the assessment server.
Use the following steps to add a custom remediation action:
- Select the Add button to open the Add Custom Remediation Action window.
- Enter the Test Case ID for the particular violation being remediated by the custom action. Test Case ID is found in the Health Results Details subtab in the End-Systems tab.
- Add a custom description of the violation (required) and an optional custom solution.
- If you have multiple portal configurations and you want to use this custom remediation action in all of your configurations, select the Add to All Portal Configurations option. This option overwrites any existing custom actions defined for the test case ID.
- Select OK. Whenever the test case ID is listed as a violation on the web page, the custom violation description and solution you define is displayed instead of the remediation actions provided by the assessment server.
Select the Define Default Custom Action checkbox to advise end-users to contact the Helpdesk regarding additional security violations not explicitly listed with custom remediation actions. If this checkbox is selected, only the violations and associated custom remediation actions listed in the table would be presented to the user, along with a message advising them to contact the Helpdesk for any other security violations not explicitly configured with a custom remediation action. Select the Edit button to edit this message.
To copy a custom action to another portal configuration, select the action in the table and select the Copy To button. A window opens where you can select the portal configurations where you want to copy the action, and whether you want it to overwrite any existing custom remediation actions already defined for that test case ID.
Portal Web Page URLs
The following table provides a list of URLs for accessing commonly used portal web pages. You can also access these web pages using the Engine Portal Pages button at the bottom of the Portal Configuration window.
| Web Page | URL |
Preview Web Page
Allows you to preview the web pages that may be accessed by the end user during the assessment/remediation and registration process. | https:// ExtremeControl engine IP /screen_preview |
Registration Administration Page
Lets administrators view registered devices and users, and manually add, delete, and modify users. | https:// ExtremeControl engine IP /administration |
Registration Sponsor Page
Lets sponsors view registered devices and users, and manually add, delete, and modify users. | https:// ExtremeControl engine IP /sponsor |
Pre-Registration Page
The pre-registration web page lets selected personnel easily register guest users in advance of an event, and print out a registration voucher that provides the guest user with their appropriate registration credentials. | https:// ExtremeControl engine IP /pre_registration |
Self-Registration Page
Allows an authenticated and registered user to self-register additional devices that may not have a web browser (for example, game systems). | https:// ExtremeControl engine IP /self_registration |
External captive portal service
Use the External Captive Portal if you are using an external captive portal service, for example, ExtremeGuest.
External Captive Portal
Use this panel to configure an external captive portal service (for example, ExtremeGuest) based on parameters in ExtremeCloud IQ Site Engine and your ExtremeControl engine .
To use this configuration, redirect all traffic to your ExtremeControl engine to http://nac_ip_address/redirect_with_info . All traffic that passes this address is redirected again to an external captive portal service of define.
If your service serves captive portals to unregistered users, modify their Policy profiles to allow traffic to this specific domain.
- ExtremeGuest — Select this configuration if you are using ExtremeGuest for your external portal service. This configuration is system-defined and cannot be edited.
- Custom — Select this configuration to specify the attributes ExtremeControl is sending to your external portal service yourself. When Custom is selected, the Attributes to Send section of the panel is available.
| NOTE: | The redirecting agent can use the "X-Forwarded-Host" header to inject this attribute. |
|---|
For information on related help topics:
- Message Strings Editor
- Look and Feel
- Captive Portal Configuration
- Accessing the Portal Configuration
- Default portal configuration
- Network Settings
- Administration
- Registration Settings
- Third-party guest registration
- Authentication
- Redirection
- Web Access Settings
- Web Page Settings
- Remediation Attempt Limits
- Remediation Links
- Custom Remediation Actions
